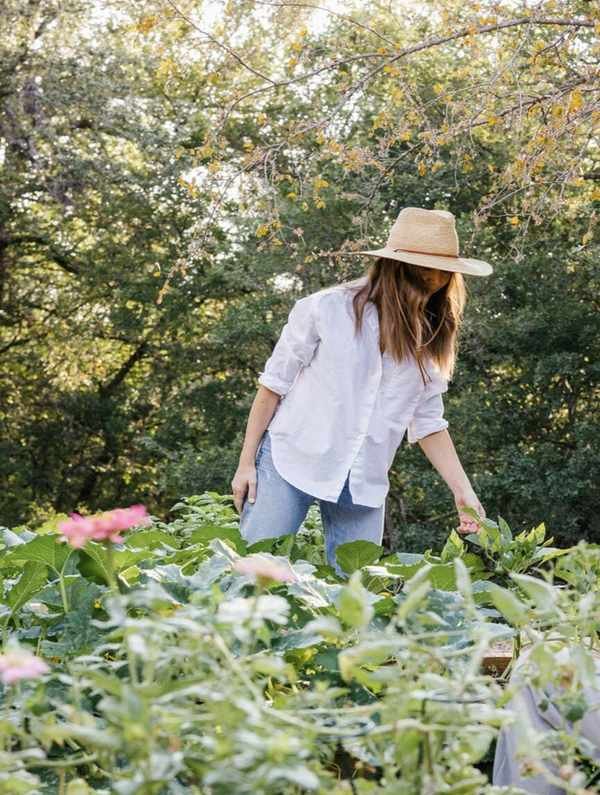
My passion for cooking and eating fresh, seasonal produce inspired me to create vegetable gardens. I've always dreamed of stepping into my backyard to gather herbs and veggies for dinner. I envisioned armfuls of mint, crisp little gem lettuce, and vibrant spring blooms for our dining table.
As we gradually developed our backyard, we knew we wanted to add raised garden beds for growing our favorite vegetables and herbs. Last fall, we finally took the plunge. Over a few months, we explored how to construct DIY raised garden beds. The whole family got involved, and the kids found joy in getting their hands dirty, making them more inclined to enjoy the veggies we harvested.
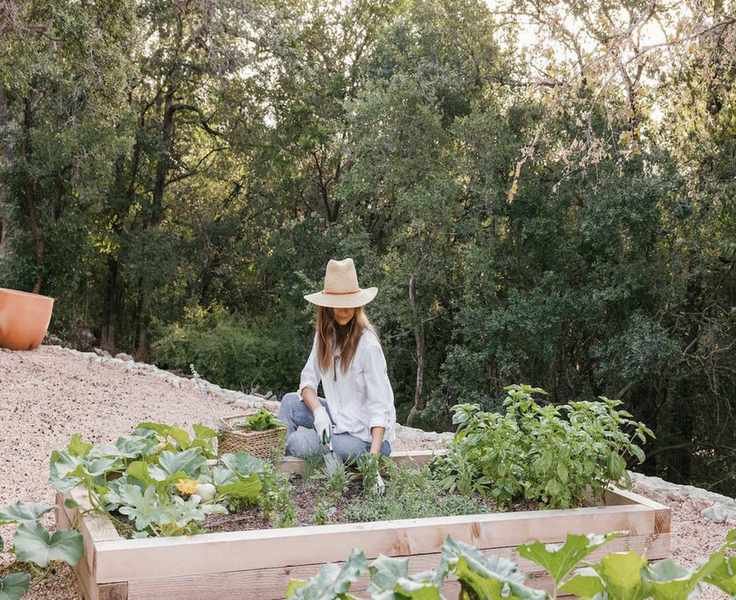
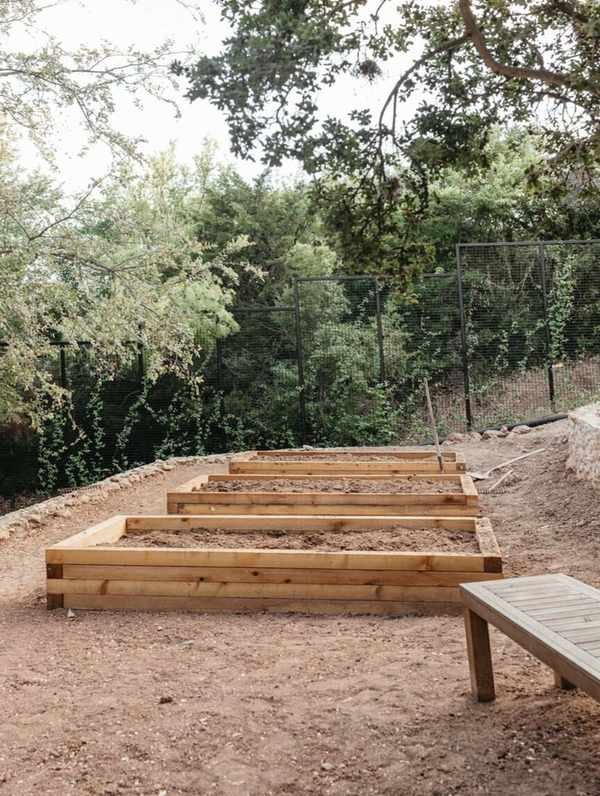
This project involved clearing land behind our house, leveling a hillside, and building three raised wooden beds. The effort was worth every bit of sweat.
Harvesting the fruits of our labor has been a fulfilling way to incorporate nature into our daily lives.
Here's a step-by-step guide on how we made our raised garden beds a reality.
- Building a DIY Raised Garden Bed
- 1. Clear and Level the Land
- 2. Plan the Placement of the Raised Garden Beds
- 3. Construct the Frames
- 4. Add Quality Soil for Gardening
- 5. Set Up Sprinklers
- 6. Plant the Garden
Building a DIY Raised Garden Bed
Materials needed for 3 raised garden beds:
- White spray paint
- 12 cedar boards
- Rebar
- Battery-operated drill
- Shovel
- 16-20 bags of soil
- Wheelbarrow
- Drip sprinklers (optional)
- Vegetable seeds or seedlings
- 1 cubic yard of pea gravel (optional)


1. Clear and Level the Land
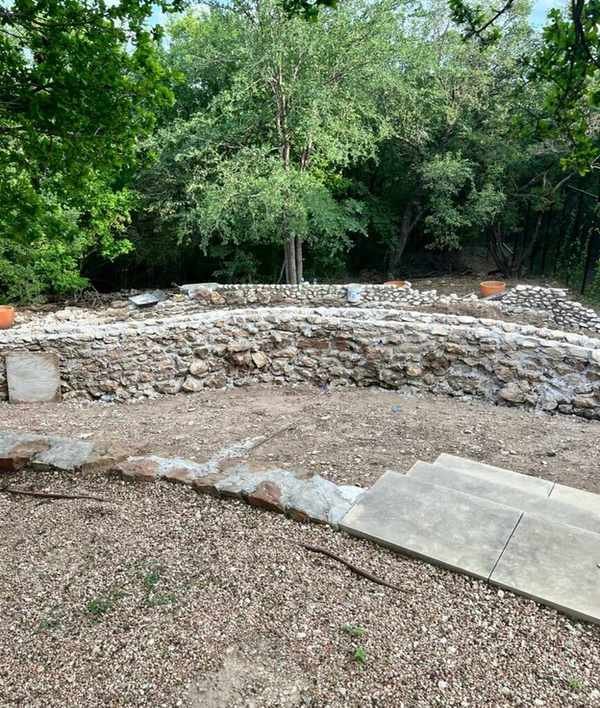
To build the raised beds, we first needed to clear and flatten a section of our backyard. Our home is situated on a hillside, with a foundation supported by a 30-foot retaining wall. The plot below is sloped, so we've been clearing brush over the years, leaving us with a spacious area to work with.
To prepare the site, we spent the first month leveling the ground by bringing in dirt and creating terraces for the beds.
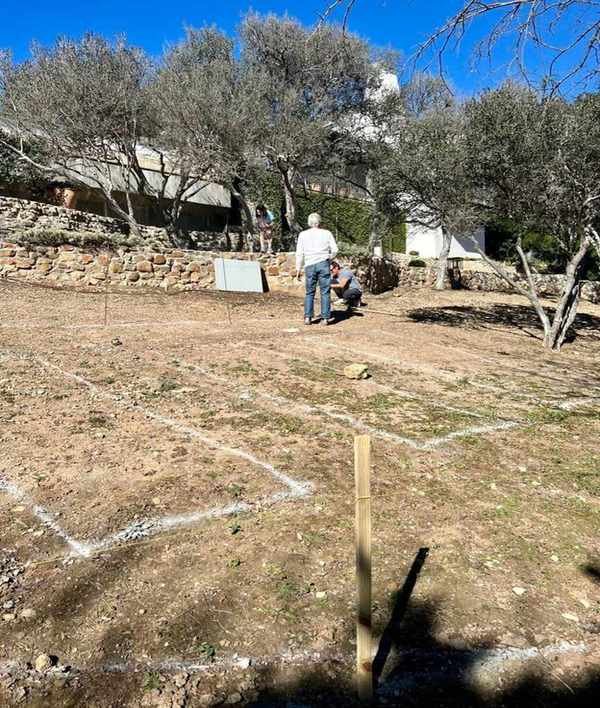
2. Plan the Placement of the Raised Garden Beds
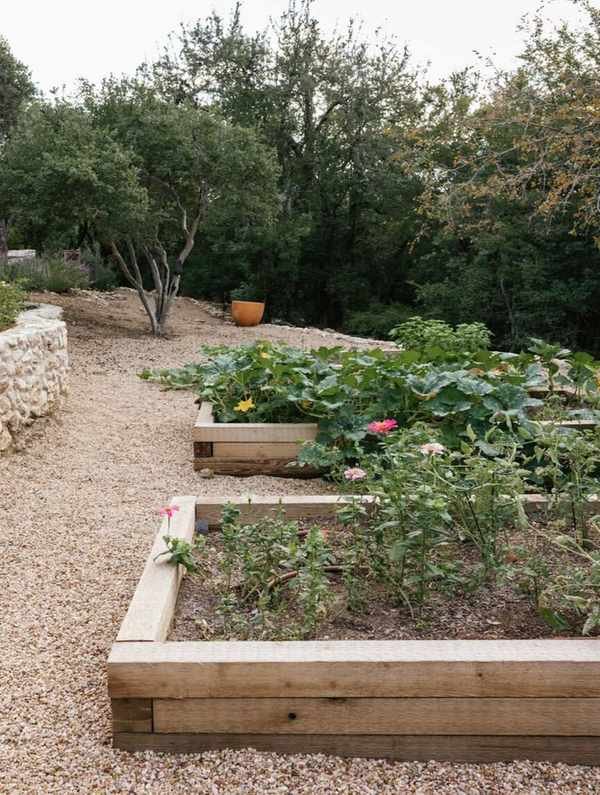
Next, we outlined the exact spots for the beds. Using white spray paint, we marked rectangles for the three garden beds. We ensured ample space between them for a walkway that could accommodate a wheelbarrow and to allow sunlight to reach all beds without casting shadows.
3. Construct the Frames
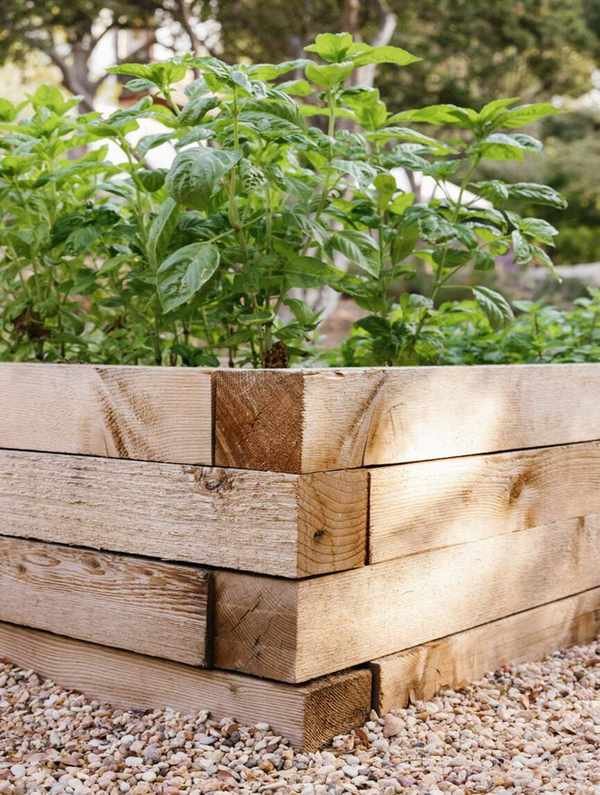
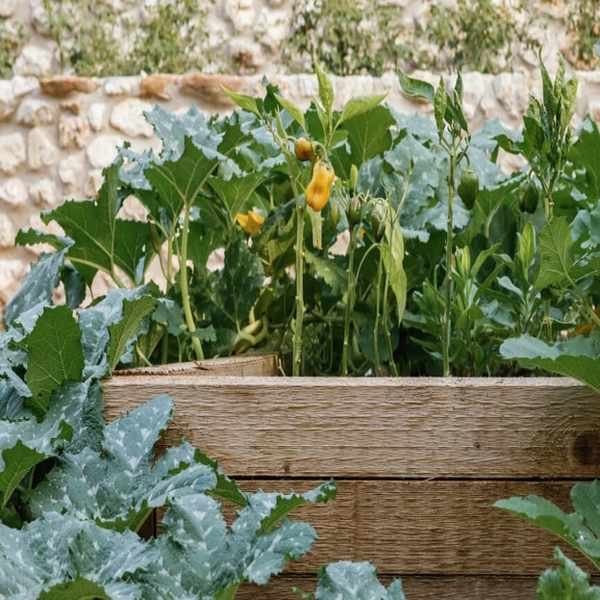
With the layout established, we got to work on the frames. We opted for affordable cedar boards, which are sturdy and easier to cut than tropical hardwoods. Each of the three rectangular beds was designed to measure 8 feet by 4 feet. Since our cedar boards were already 8 feet long, minimal cutting was needed.

4. Add Quality Soil for Gardening
We filled each vegetable bed with 16-20 bags of nutrient-rich potting soil.
5. Set Up Sprinklers
Given the scorching Texas sun from July to September, we installed drip sprinklers to ensure our plants receive consistent moisture. These pipes sit just below the soil surface, delivering water directly to the roots while minimizing evaporation. We set them on a timer for regular watering at optimal times.
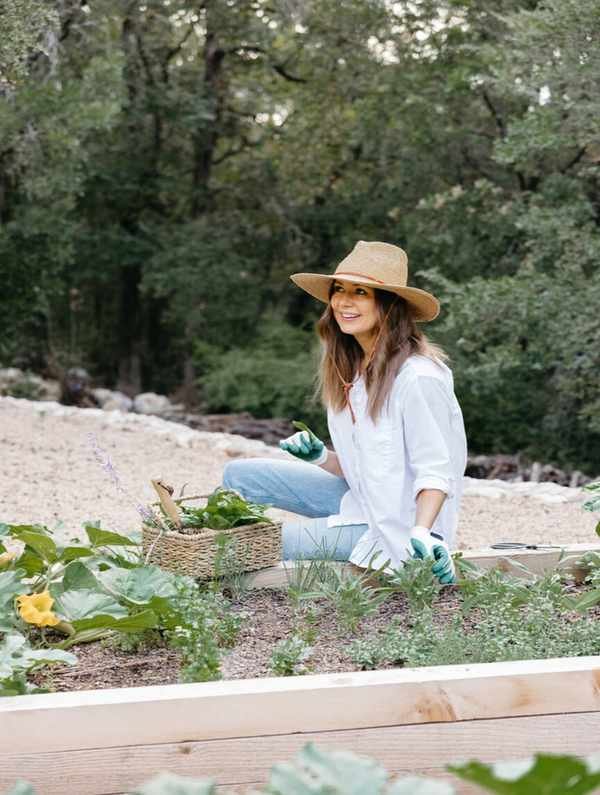
6. Plant the Garden
This is the moment we'd been anticipating! I researched which plants thrive in Austin's Zone 8, considering the extreme heat and occasional cold spells.
I dedicated each bed to a specific purpose:
- 1 – flowers
- 2 – herbs
- 3 – vegetables
I initially planned using the square-foot gardening method and mapped out each plant's location. However, I ended up purchasing more plants than expected because they were all so appealing!
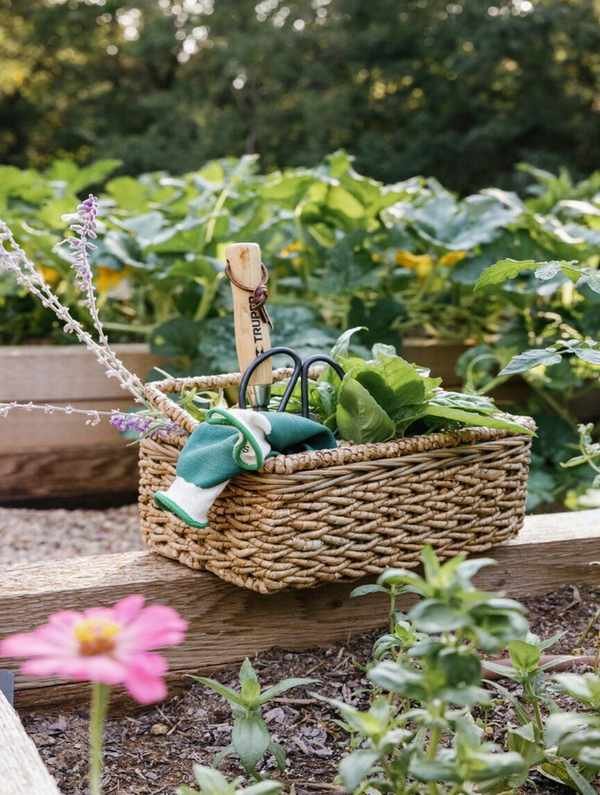
For herbs, I planted parsley, dill, chives, mint, basil, cilantro, thyme, and rosemary, all of which flourished. Weekly, I'd gather large bunches to keep in mason jars on the kitchen counter for cooking.
My vegetables required a bit of adjustment. I planted squash in the fall, which grew larger than anticipated, leaving less room for lettuces.
The zinnias bloomed beautifully and lasted until October, providing fresh flowers for our dining table throughout the season.

I gained valuable experience from our first planting season. Though not everything went perfectly, I enjoyed the process immensely. I learned not to stress about minor setbacks and channeled my knowledge into our current spring garden. Follow my journey on Instagram highlights to see how it's progressing.
30 Simple Delights to Add to Your June Calendar