
One design element in our home nagged at me so much that it sparked our entire kitchen overhaul. Surprisingly, it was the large stainless steel hood above our stove. Twelve years ago, I didn’t explore other kitchen hood designs, but as my taste evolved, that shiny monstrosity became increasingly frustrating. Thus, my quest to revamp our kitchen on a budget began. I was excited to collaborate with KitchenAid for stunning new appliances, including a hood liner that paired beautifully with my new plaster hood surround, as well as Caesarstone, with whom we had previously worked on a studio kitchen renovation.
I fell deep into Pinterest and was inspired by this plaster hood surround, which became the foundation for our minimalist, earthy kitchen transformation.
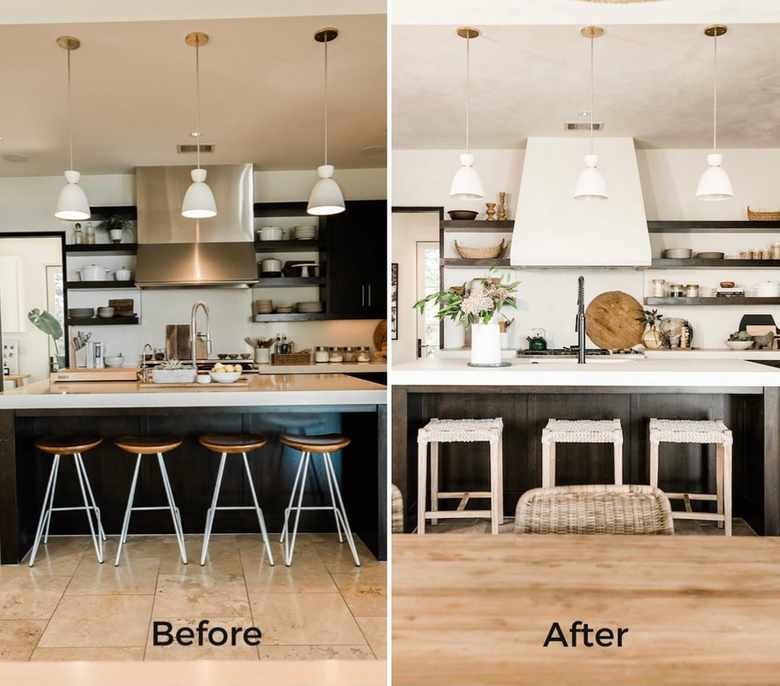
The journey evolved significantly, and I couldn't be happier with the outcome. Continue reading for the before-and-after images, the design journey, and all the new space photos (with shopping links).
As mentioned in last week’s living room reveal, our renovation began as a major project, but we scaled back to focus on impactful changes within our budget. I elaborated on our initial plans versus what we ultimately executed in this IGTV episode.
Initially, we considered replacing all the cabinetry with a lighter oak, but the cost proved prohibitive. Instead, we decided to work with the espresso-stained cabinets and shelving we already had. Custom cabinetry can be costly, and changing just that would have exhausted our kitchen budget. I’m thrilled to present the final result! Keep scrolling as I detail how we achieved this kitchen transformation on a budget.
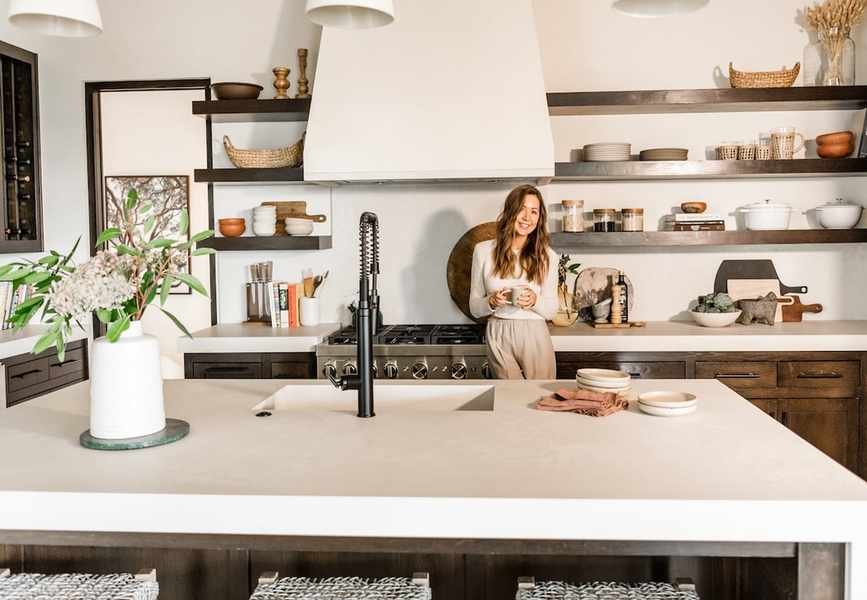
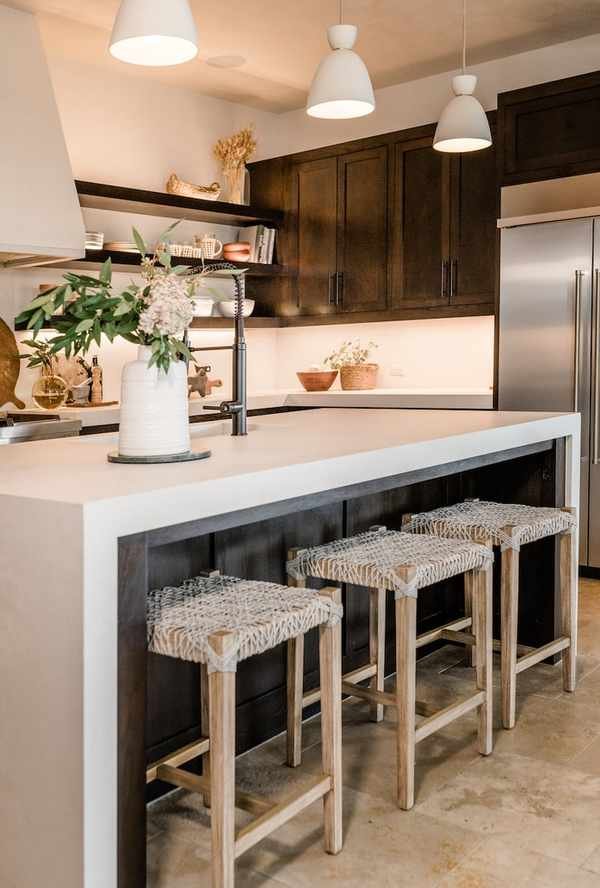
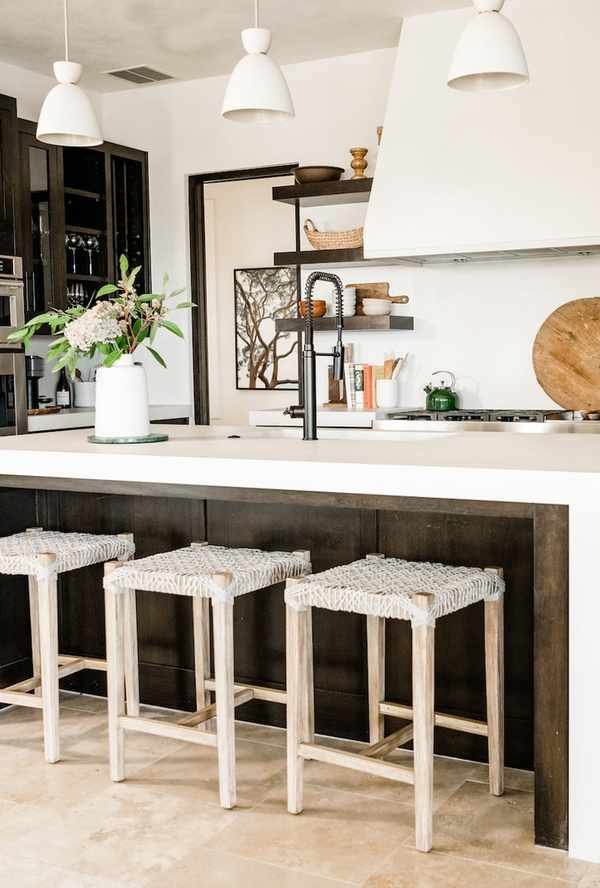
Beautiful White Plaster Hood Surround
Our framer crafted a custom slanted surround for our KitchenAid custom hood liner, which we covered in American Clay in forté white (which I discuss more here). I adore this solution: the hidden ventilation system is mounted inside the surround, creating a sleek appearance.
This change significantly impacted the overall house design since our open floor plan makes the hood visible right from the front door. The natural shape and material resonate with my style and establish the kitchen’s ambiance. It’s incredible how this one update modernized the space.
Though it appears straightforward, the hood surround presented a few design hurdles, as it was custom-built for our kitchen. We had to ensure the angles were precise—the first attempt was slightly off, but thankfully our framer corrected it easily. After constructing the hood surround, I noticed our measurements were slightly inaccurate, exposing a bit of the stainless hood insert at the bottom. To give it a polished look, I had a leftover piece of Caesarstone from our cabinetry cut into a two-inch wide trim to cap the bottom.
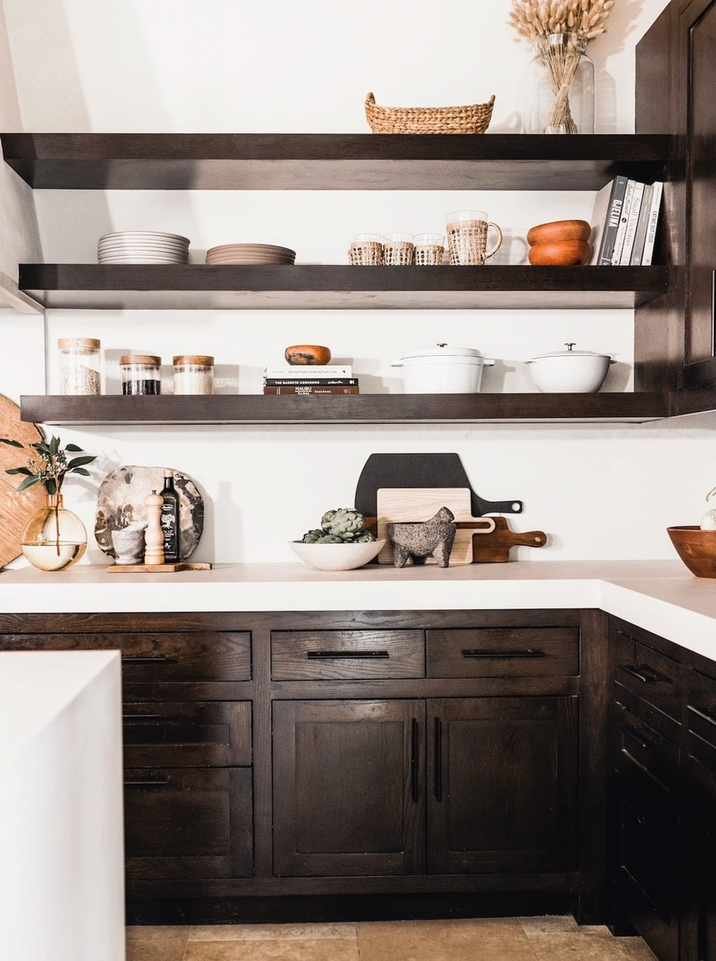
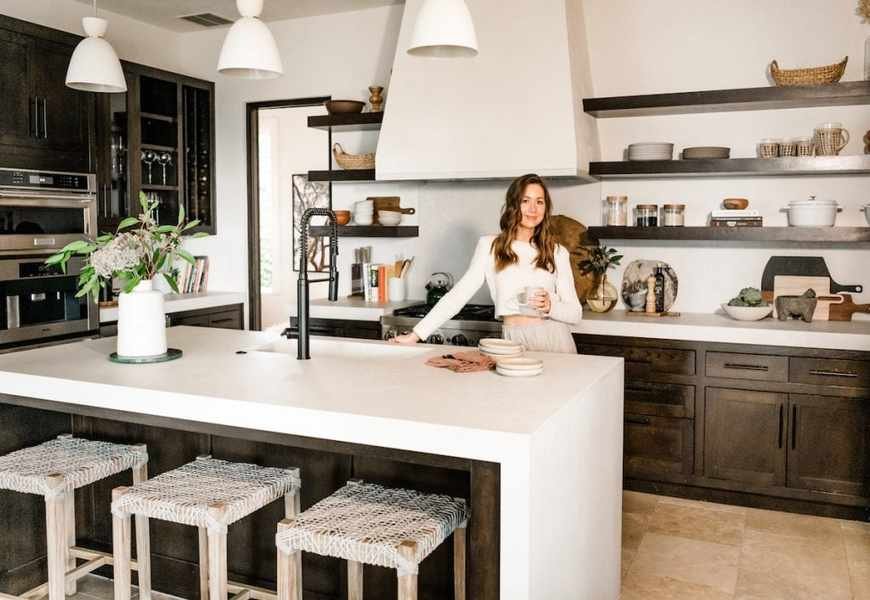
Enhanced Open Shelving
Instead of removing all cabinetry, we only took out three corner cabinets and expanded the open shelving to allow more natural light and showcase our favorite items. The result is lighter and brightens the kitchen significantly. I’m amazed at the transformation brought by this small adjustment.
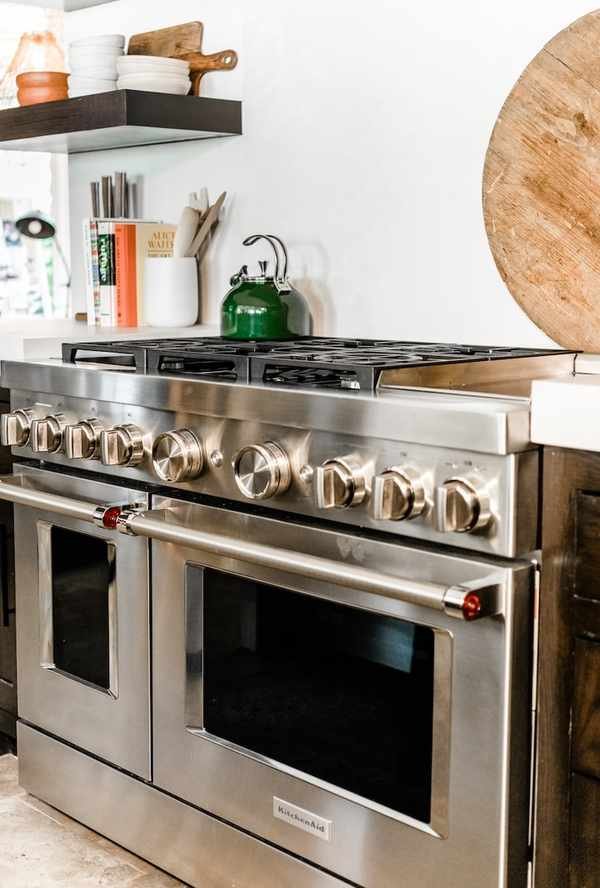
Our New KitchenAid® Range
Our previous appliances had served us well for eleven years, but they were nearing the end—my smaller oven had failed, and the larger one was inconsistent with temperatures. I’ve admired KitchenAid products since we used them in our studio kitchen, and this remodel was the perfect chance to incorporate them into my home. Having these appliances has reignited my passion for cooking; I actually look forward to dinner prep each night (and cleanup is a breeze with my new KitchenAid® dishwasher, which I elaborate on here).
Let’s talk about my new favorite appliance: the KitchenAid® 48″ Smart Commercial-Style Dual Fuel Range. It’s designed for home cooks who are passionate about cooking. The dual flame burners are impressively powerful and easily adjustable for searing, simmering, stir-frying, and sautéing (I’ve never seen water boil so fast). The double oven saved the day during Thanksgiving—both stuffing and sweet potatoes fit without a battle for oven space—and they maintain consistent temperatures for baked goods, roasted chicken, and perfectly caramelized vegetables. Plus, it’s gorgeous, available in eight colors. It truly balances style and function; I can’t recommend it enough.
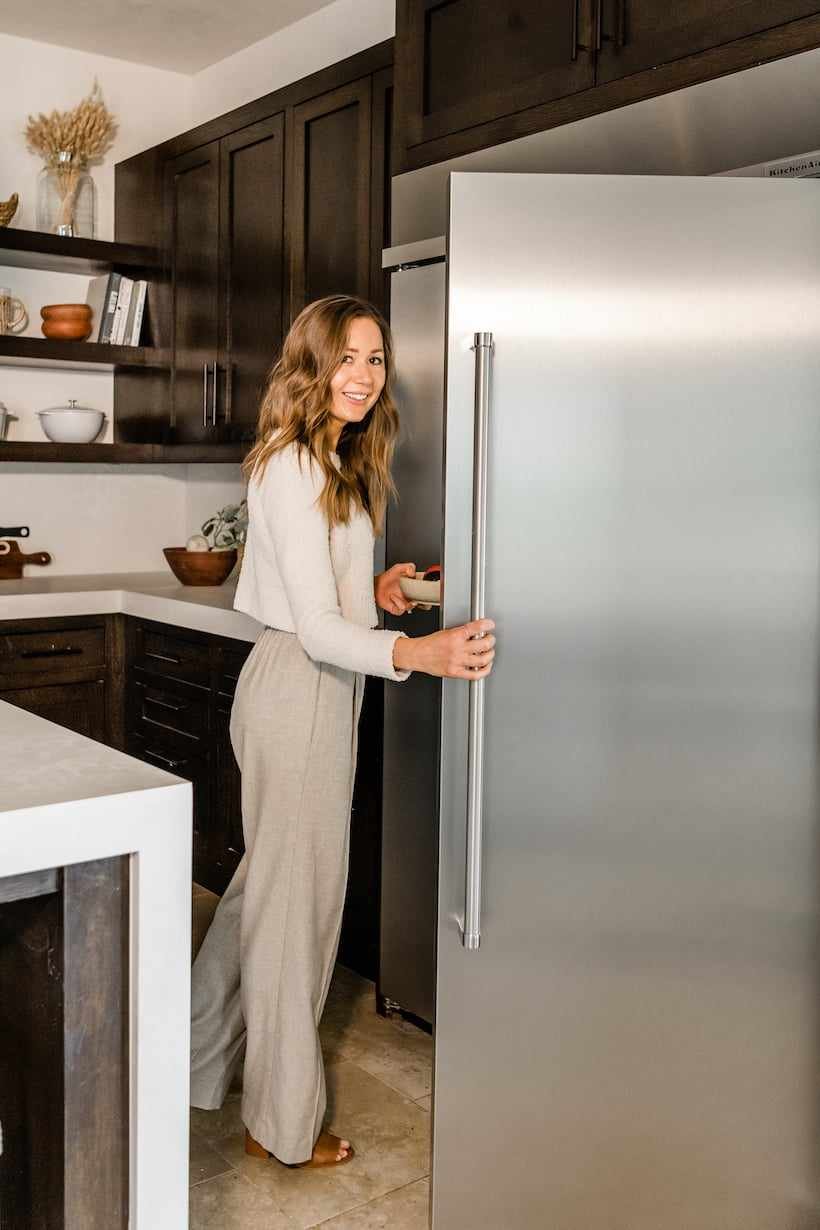
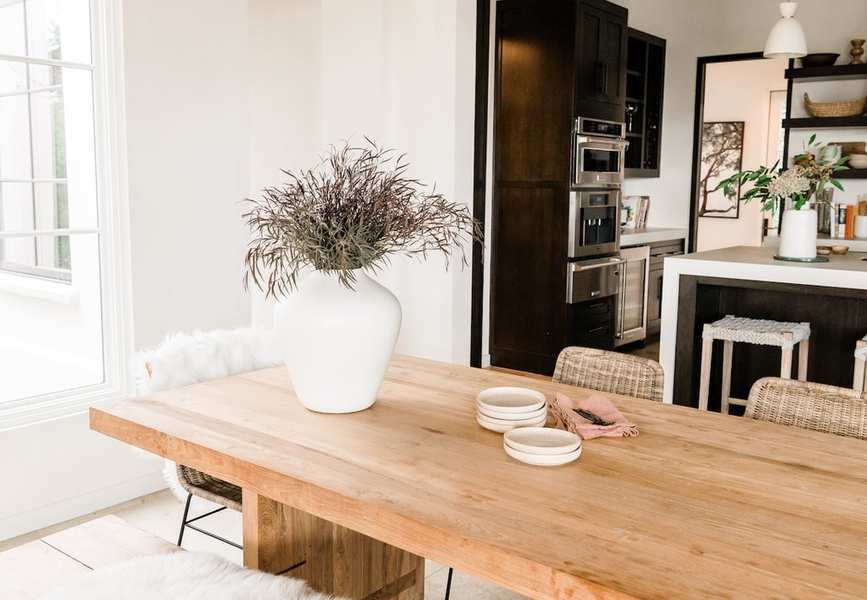
Our New KitchenAid® Refrigerator
My experience with my recent pantry makeover taught me that efficient design makes a space feel significantly larger. Take this KitchenAid® 30.0 cu. ft 48-Inch Width Built-In Side by Side Refrigerator with PrintShield™ Finish, for instance. Its smart design has made my fridge feel spacious instead of overcrowded. Sometimes Adam opens it and asks, "Why does the fridge look so empty?" I smugly show him the well-organized drawers full of food.
Beyond its layout, this fridge excels in other areas. Its ExtendFresh™ Plus Temperature Management System keeps the perfect temperature for fresh ingredients. And I love the PrintShield™ Finish, which resists fingerprints—a huge plus in our household.
In our wet bar area, we added the KitchenAid® 24″ Wine Cellar with Glass Door and Wood-Front Racks, which conveniently holds 46 wine bottles—plenty of room for our collection, especially when entertaining. The two temperature-controlled zones allow us to store white and red wines at their ideal temperatures.
Bright Caesarstone Countertops, Island, and Backsplash
We replaced our old countertops and backsplash with bright white Caesarstone in Cloudburst Concrete. This is my third project using Caesarstone: it’s stunning, durable, and stain-resistant—I'm always drawn back to it.
This time, we opted for a waterfall edge on the island, where the countertop extends down the sides (covering the cabinetry). I also envisioned a seamless sink made from Caesarstone that flows from the countertop into a cutout sink and back up.
I was initially apprehensive about this design choice, but after consulting with my countertop fabricator and plumber, I decided to proceed—and I’m thrilled I did! If you want to create a “continuous sink” look, here’s my advice:
- Choose a durable, stain-resistant material (sink edges can chip easily). This Caesarstone fits the bill and still looks amazing.
- A stone sink is heavier than a standard one, so have a carpenter provide proper support beneath the sink base.
- Discuss the right drain and disposal type with your plumber, and ensure the measurements are accurate before cutting the stone.
Matte Black Faucet and Cabinet Hardware
I’ve long wanted to replace our stainless steel hardware. I was tired of that shiny look I picked over a decade ago and now wonder why I waited so long. This upgrade was my best money-saving decision in this kitchen makeover. The total cost of our hardware was under $300, dramatically transforming the space.
I ordered this sink faucet, unsure if it would be good due to its low price. I was pleasantly surprised by its beauty and quality upon arrival. The same goes for these cabinet and drawer pulls—affordable and stylish. The matte black finish contrasts beautifully with the dark espresso-stained wood (I’m a fan of the black-brown combo), making the hardware blend seamlessly into the wood.
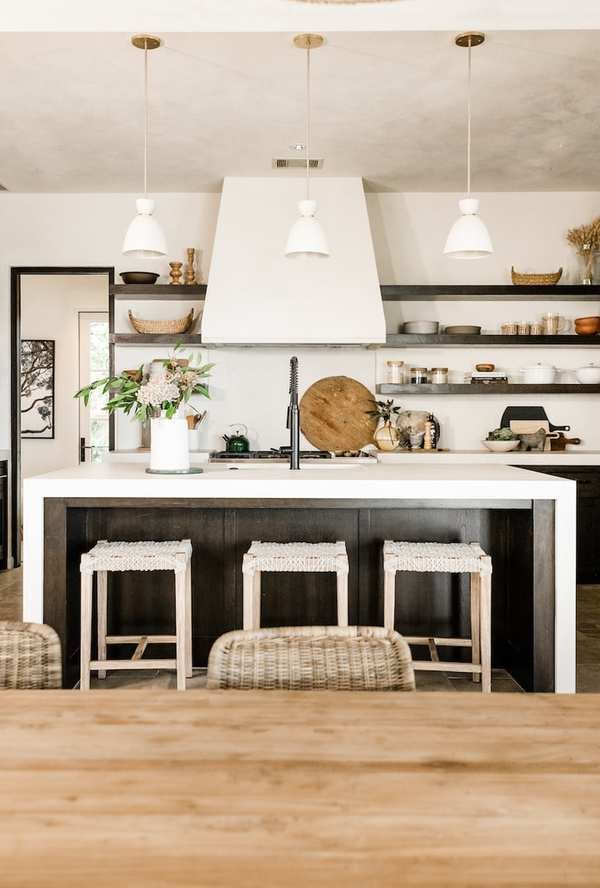
Light, Beachy Barstools
I searched extensively for the perfect barstools and finally found these gems, the Carmel Counter Stools from Dear Keaton. I wanted something airy, yet many I found were either too modern or too farmhouse-style. I love that these have a rope seat for a beachy feel and are surprisingly comfortable. The whitewashed wood base adds an earthy touch, contrasting perfectly with the espresso-stained island.
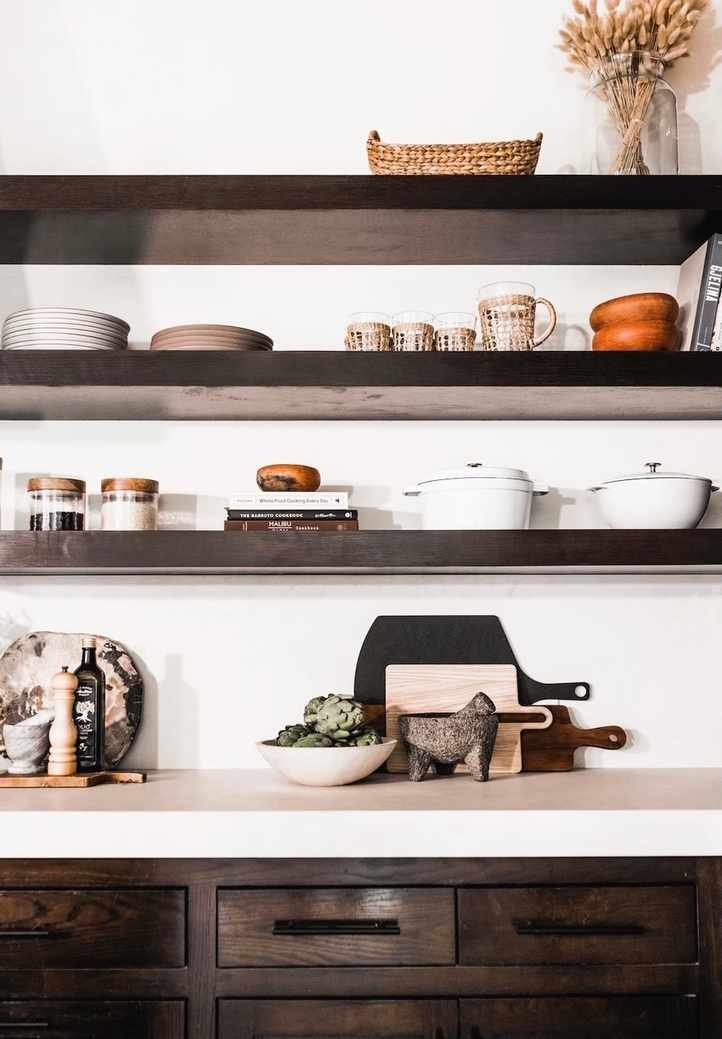
Simplified Shelf Styling
Chanel helped me refine the display of items on my open shelves. It was incredibly helpful to have a fresh perspective on my styling approach. Even if you’re styling alone, I recommend clearing your shelves and experimenting with rearranging items. You might discover a fresh idea that inspires you. There’s no easier (or cheaper) weekend project than restyling your shelves.
Consider other objects for your shelves, like a vase filled with dried branches, canisters for dry goods, a bowl of lemons, or that mortar and pestle gathering dust in a cabinet. My styling adventure resulted in a fresh, simplified look for my open shelves, feeling just right for now—until I inevitably rearrange it again in a few weeks. ?
 What do you think? Feel free to leave a comment with any questions about our new kitchen—I’ll do my best to provide answers and gather sources for any products you’re curious about here next week!


